
Oral Deep Cleaning relies on more than a powerful scaler. Clinicians need equipment that supports careful assessment, controlled removal of deposits, and patient comfort. A typical setup may include an ultrasonic scaler with suitable tips, periodontal hand instruments, reliable suction, and protective barriers. The right combination depends on the patient, the treatment plan, and the clinician’s training. Small details matter. A clear view, a comfortable grip, and a well-maintained water line can make a busy appointment smoother.
This guide reviews equipment commonly used in dental clinics and explains practical points to consider when comparing options. We look at performance, ergonomics, maintenance needs, and compatibility with routine infection-control procedures. Specifications can help, but they do not tell the whole story. Tip availability, servicing support, and how equipment feels during repeated use also deserve attention. No device is perfect. A feature that helps one practice may add cost or complexity to another, and even a thorough checklist can miss problems noticed only during daily use. Product choice should therefore be matched to clinical needs, manufacturer instructions, and applicable professional guidance. The aim is not to replace clinical judgment, but to make purchasing decisions clearer and more informed.
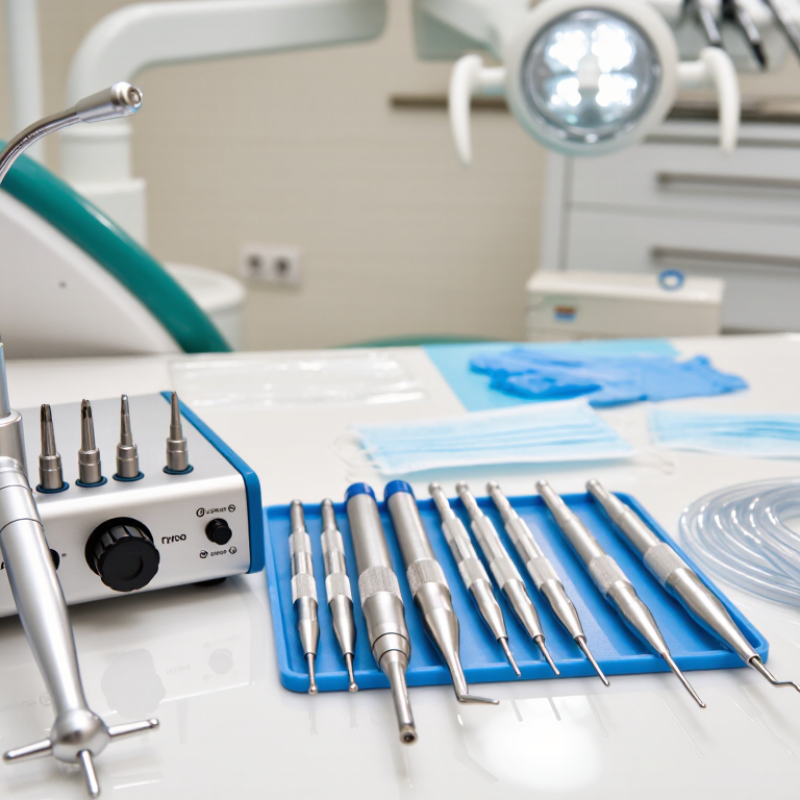
Oral deep-cleaning equipment includes powered ultrasonic scalers, hand instruments, periodontal probes, and high-volume suction. Ultrasonic tips break up hardened deposits with water irrigation; curettes help clean root surfaces and areas a tip may miss. A probe measures pocket depth before and after treatment. Small details matter: a clear view, steady suction, and a comfortable instrument grip.
The CDC-supported National Health and Nutrition Examination Survey analysis found periodontitis in 47.2% of U.S. adults aged 30 and older. This finding, published in the Journal of Periodontology, underscores the need for reliable periodontal assessment and care. Deep cleaning also depends on infection-control supplies, including protective barriers and properly processed instruments. The setup is not always perfect; access to back teeth can still feel awkward, even with suitable tools.
Tips: Match the scaler tip to the treatment area, and check water flow before use. Keep curettes sharp and inspect them regularly. Follow current CDC guidance for cleaning, sterilizing, and storing reusable instruments. Cleaning matters.

Top Oral Deep Cleaning Equipment for Dental Clinics
Subgingival deposits are not always visible, so careful assessment matters. CDC data from 2009–2014 estimated that 42.2% of U.S. adults aged 30 or older had periodontitis. This makes reliable periodontal care important, though equipment alone cannot replace diagnosis.
Ultrasonic scalers use high-frequency vibration and water to disrupt deposits and flush the working area. Their slim tips can help reach around teeth, but pressure and angulation need control to avoid unnecessary tissue trauma. Hand instruments, such as curettes, offer tactile feedback for checking root surfaces and removing stubborn calculus. A Cochrane review on periodontal treatment found no clear, clinically important advantage of powered over hand instrumentation; certainty in the evidence was limited. In practice, clinicians often combine both, guided by deposit location, patient comfort, and ongoing reassessment. Some deposits may still be missed. That deserves a second check.
Tips: Use light, overlapping strokes and inspect the tip regularly for wear. Follow the instrument’s instructions for water flow and settings. Reassess tissue response and residual deposits before ending the appointment.
| Equipment or Instrument | How It Works | Deposits and Areas Addressed | Common Clinical Role | Key Considerations |
|---|---|---|---|---|
| Ultrasonic scaler | A powered tip vibrates at high frequency. Water irrigation helps cool the tip, flush the working area, and carry away loosened debris. | Removes calculus and disrupts plaque biofilm on accessible tooth surfaces, including selected subgingival areas. | Efficient removal of deposits across multiple teeth during periodontal debridement. | Use an appropriate insert, power setting, water flow, and light touch. Adapt technique to the patient’s tissues, tooth surfaces, and clinical needs. |
| Magnetostrictive ultrasonic insert | The insert tip moves in an elliptical pattern, with multiple surfaces capable of being used when correctly adapted to the tooth. | Supragingival and subgingival calculus, depending on insert design and clinical access. | Broad deposit removal; slim inserts can assist access in narrower periodontal pockets. | Maintain the intended tip orientation and keep the working surface moving. Follow the insert’s instructions for use. |
| Piezoelectric ultrasonic insert | The tip moves in a linear pattern, with the lateral surfaces commonly used for deposit removal. | Calculus and biofilm on accessible tooth surfaces; insert shape determines access and intended use. | Controlled scaling with inserts selected for the location and type of deposit. | Adapt the correct side of the tip to the tooth and avoid prolonged contact in one spot. Device and insert designs vary. |
| Universal curette | A hand instrument with two cutting edges per working end removes deposits through controlled strokes. | Supragingival and subgingival calculus on many tooth surfaces. | Manual scaling and deposit removal where tactile feedback and access are useful. | Requires correct angulation and a secure grasp. Keep the instrument sharp and use careful strokes to minimize unnecessary tissue or root-surface trauma. |
| Area-specific curette | A curved blade is designed to adapt to particular tooth surfaces and root anatomy. | Subgingival deposits on selected surfaces, including areas that may be difficult to reach with a universal curette. | Site-specific instrumentation during periodontal debridement. | Select the instrument for the tooth surface and pocket access. Proper adaptation and clinician training are essential. |
| Sickle scaler | A pointed, triangular working end removes deposits with short, controlled strokes. | Primarily supragingival calculus on accessible tooth surfaces. | Removal of deposits above the gumline, particularly in accessible interproximal areas. | Its pointed design is generally not intended for deep subgingival instrumentation; use appropriate instruments for pocket access. |
| Periodontal probe | A calibrated instrument is gently guided along the tooth to assess periodontal pocket depth and tissue findings. | Does not remove deposits; helps identify and monitor periodontal sites that may need treatment. | Assessment and documentation before, during, or after periodontal care. | Use gentle technique and consistent measurement points. Findings should be interpreted as part of a full clinical examination. |
| Combination approach | Powered scaling is followed or supplemented by selected hand instrumentation as clinically indicated. | Residual calculus or deposits in areas requiring additional access or tactile assessment. | Combines efficient broad-area scaling with site-specific manual finishing. | Instrument choice and treatment sequence depend on the patient’s assessment, deposit location, anatomy, and clinician judgment. |
During periodontal scaling, ultrasonic tips send a fine coolant spray across the working area. Suction must keep pace. High-volume evacuation captures fluid, debris, and splatter near the tip, helping clinicians maintain visibility. It does not remove calculus; the instruments do that.
A 2021 Journal of Dental Research study on dental aerosols identified irrigant water as a major microbial source. This finding makes waterline maintenance part of deep-cleaning readiness. The CDC’s 2016 Summary of Infection Prevention Practices in Dental Settings specifies dental unit water quality at no more than 500 colony-forming units per milliliter. Irrigation supports cooling and flushing, but its cleanliness matters. Small details count.
Suction tip position matters. Keep it close to the scaler without blocking the clinician’s view or access. One practical flaw: suction can seem adequate while fluid pools behind molars. Pause, reposition, and check the flow instead of simply increasing suction. The CDC also advises following equipment instructions for maintaining and treating dental unit waterlines.
Top Oral Deep Cleaning Equipment for Dental Clinics
Choosing equipment for periodontal cleaning begins with the patient, not the device. Clinicians assess pocket depths, deposit buildup, sensitivity, and access around crowded teeth. An ultrasonic scaler with adjustable power and suitable tip sizes can help remove deposits efficiently. Hand instruments remain useful for checking root surfaces and reaching areas where powered tips are less practical. Small details matter. A patient with a strong gag reflex may benefit from careful suction planning and shorter treatment intervals. Medical history and existing restorations also deserve attention.
Tips: Keep several tip shapes available, and inspect them for wear before use. Match power and technique to the treatment area and patient response. If sensitivity increases, pause and reassess rather than simply raising the setting.
A clinic should also consider sterilization workflows, maintenance requirements, and staff training when comparing equipment. Ergonomic handpieces can reduce strain during longer appointments, while reliable water delivery and suction support visibility and comfort. Not every case needs every tool. Equipment choices may need adjustment as treatment progresses, and no device replaces clinical judgment or appropriate patient communication.
Top Oral Deep Cleaning Equipment for Dental Clinics
How to Maintain Equipment and Protect Patient Safety
Reliable deep-cleaning equipment depends on consistent reprocessing, not appearance alone. After each patient, clean and heat-sterilize reusable handpieces according to their manufacturer’s instructions. Remove visible debris before sterilization; dried residue can interfere with cleaning. Check seals, water connections, and suction hoses for cracks or buildup. Small details matter. Keep a written log of maintenance, cycle results, and any repair, so a missed check does not become routine.
Verification is essential. The CDC’s 2016 Summary of Infection Prevention Practices in Dental Settings recommends biological indicator testing of sterilizers at least weekly. Record each result, and investigate failures before using affected instruments. For nonsurgical care, CDC guidance also sets a dental-unit water quality target of no more than 500 colony-forming units per milliliter. Test waterlines as directed, and disinfect or treat them when results exceed the target. Use sterile water or saline for surgical procedures. A clean-looking line can still harbor microbes. It is easy to assume yesterday’s routine was enough; checking the evidence is safer.
Illustrative four-week workload: 10 sterilizer loads per day, five days per week, and 10 instrument packages per load. Counts are calculated from CDC-recommended monitoring intervals; the chart uses a logarithmic scale.
How to use this: Check and record sterilizer mechanical or physical parameters for every load, use an internal chemical indicator in each package, and run a biological indicator at least weekly. For loads containing implantable devices, use a biological indicator for every load and quarantine the load until the result is negative. Follow the sterilizer and instrument manufacturers’ instructions.
Guidance: CDC Dental Infection Prevention and Control: Sterilization Monitoring. Package count and clinic workload are illustrative assumptions, not industry averages.
Fast, modern and
At your fingertips
Tremain´s Blaze fast program
Was created for customers
That need product FAST!
Download catalog
Blaze Catalog